Getting Started / Project Management
Project Management
Project Management covers how projects are structured in HASS Cloud, where they are stored, and how to create a new project in the correct location.
Project Overview
Project Overview
A project is your main working file in HASS Cloud. It stores your system setup, inputs, and project settings used for calculations and reporting. See Project Properties (Quick Access) for the main project settings panel.Cloud Storage
Projects are stored in the cloud file system inside folders, not on local device storage.Local Files
Local files are only created when you download reports or export files through your browser.Ownership and Access
By default, you are the Owner of projects you create. You can share projects with team members, clients, or your Organization when your permissions allow it.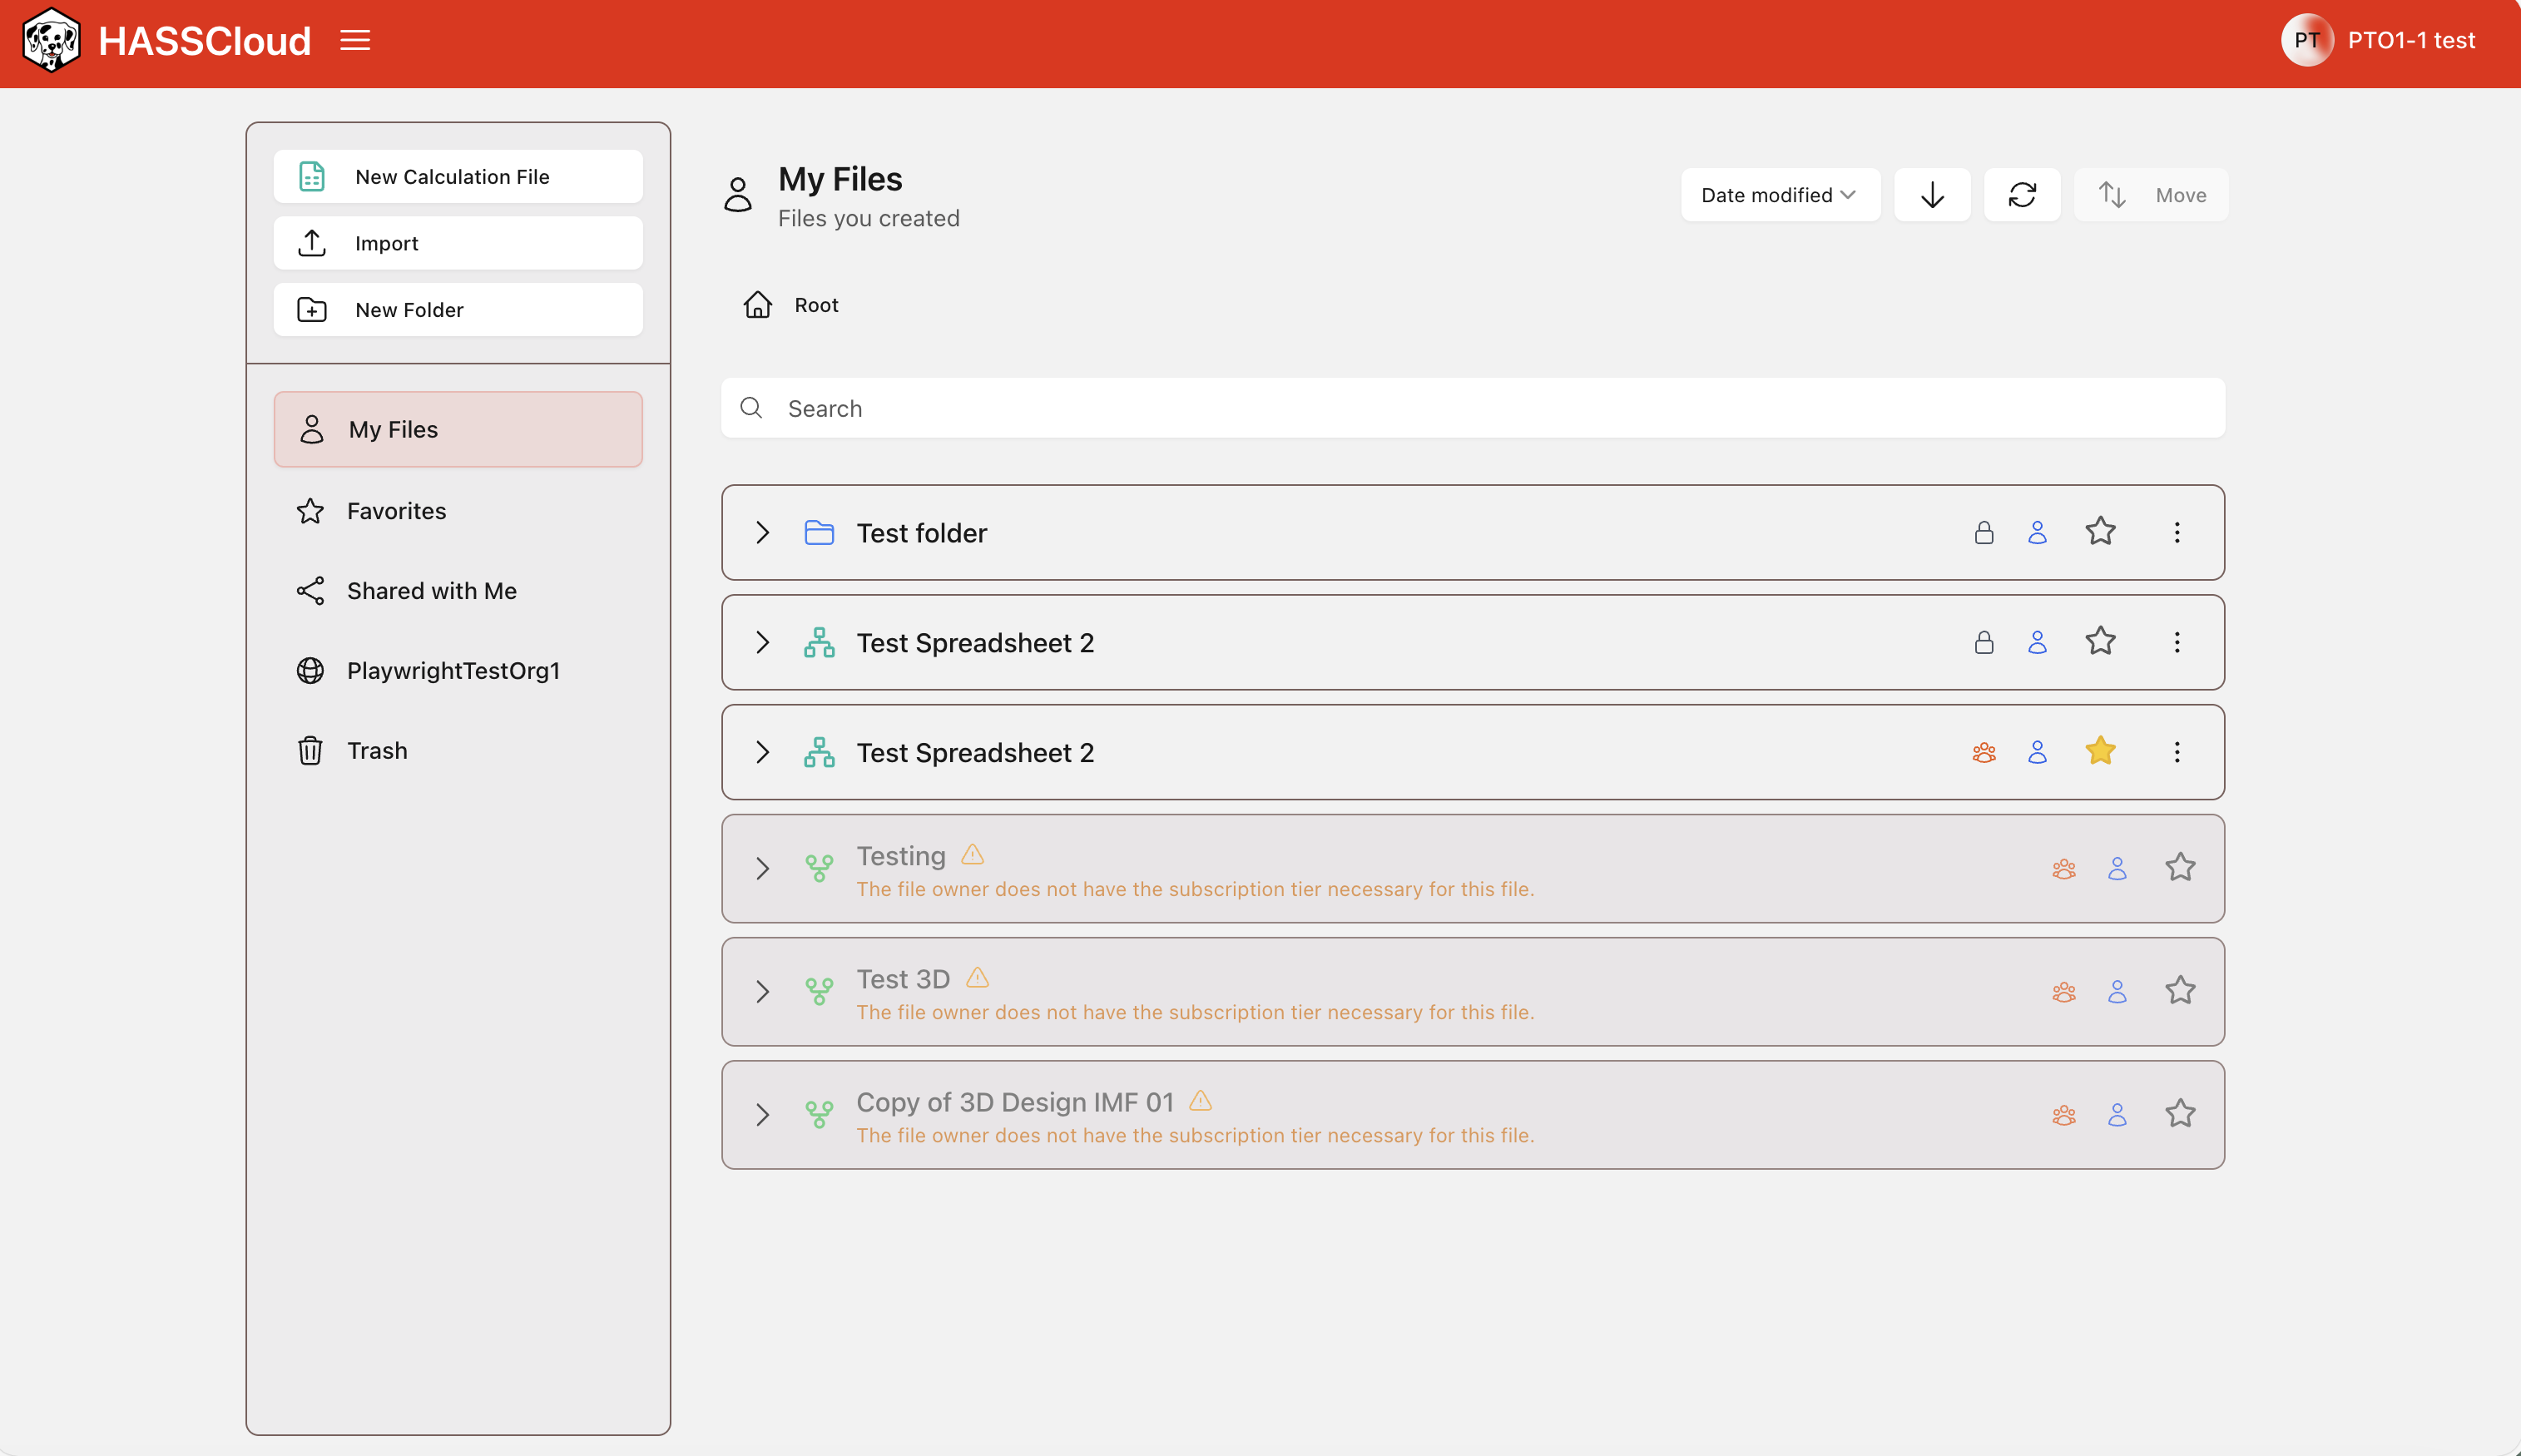
New Project
New Project
Create new projects directly in the folder where you want the file to be stored.Create a New Project
1. Open the folder where you want to save the project.2. Select New Calculation from the left side of the file system.

3. Enter the basic project details: Project Name, Description, Pipe Table, and Units. See Calculations -> Pipe Table for how Pipe Table settings affect runs.
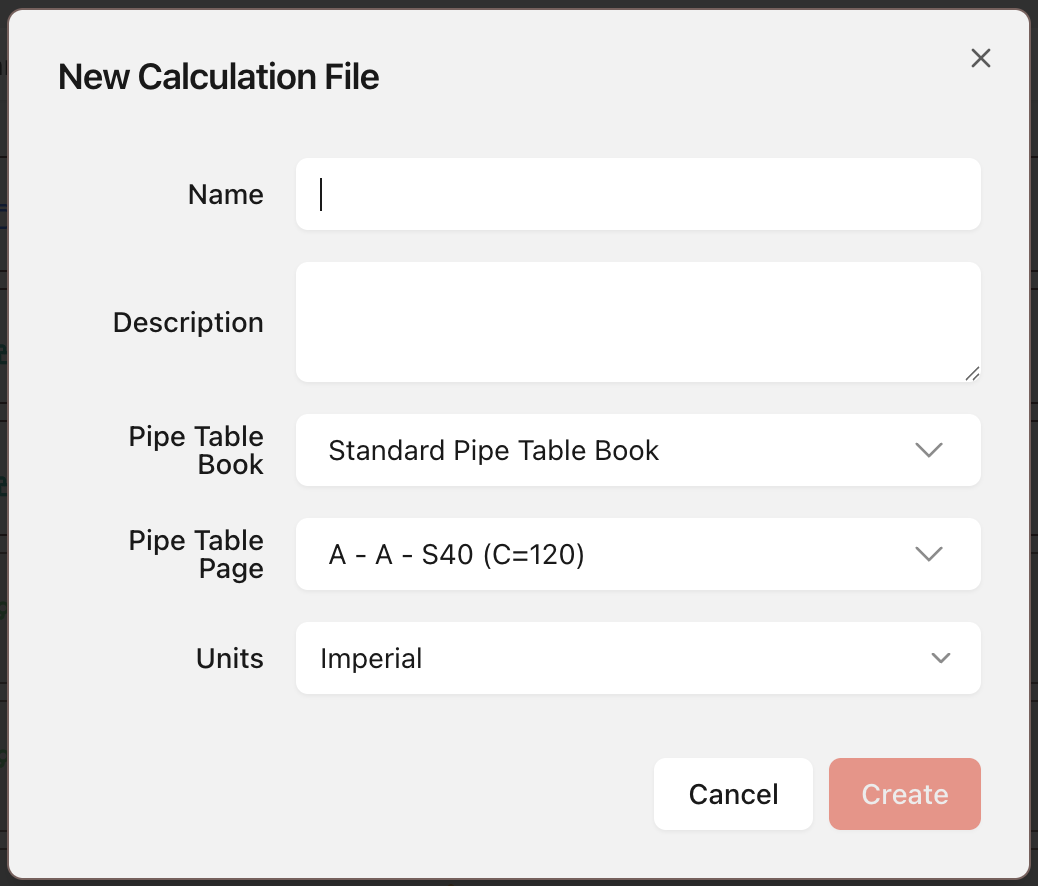
4. Click Create to save and create the project. The new project is created in the folder that was open, then opens automatically.
Sharing and Collaborating on Projects
Sharing and Collaborating on Projects
Sharing a Project
Share the project with team members, clients, or your Organization so they can access the same project file. You can share projects while in the file system or while in the project itself.How to Share a Project
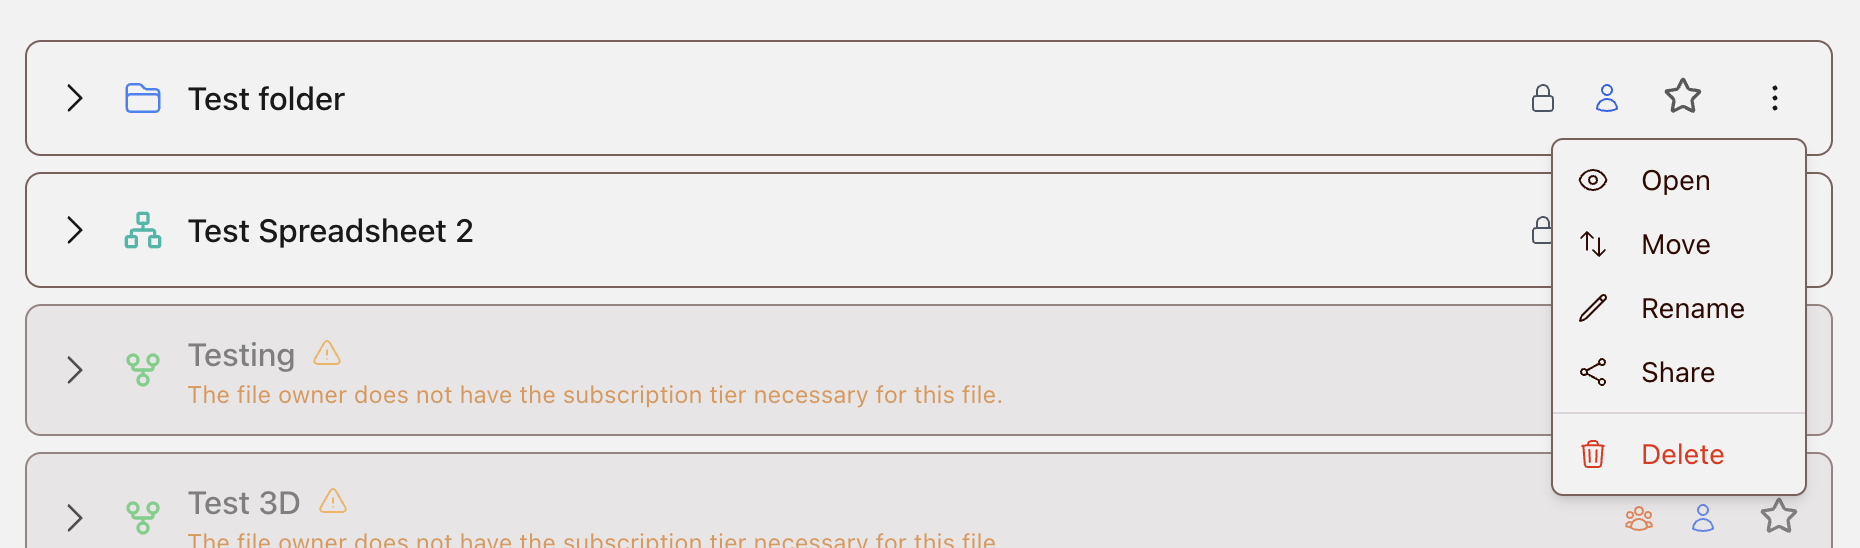
1. To share a project in the file system, find the project you want to share, click the 3-dot menu, then select Share.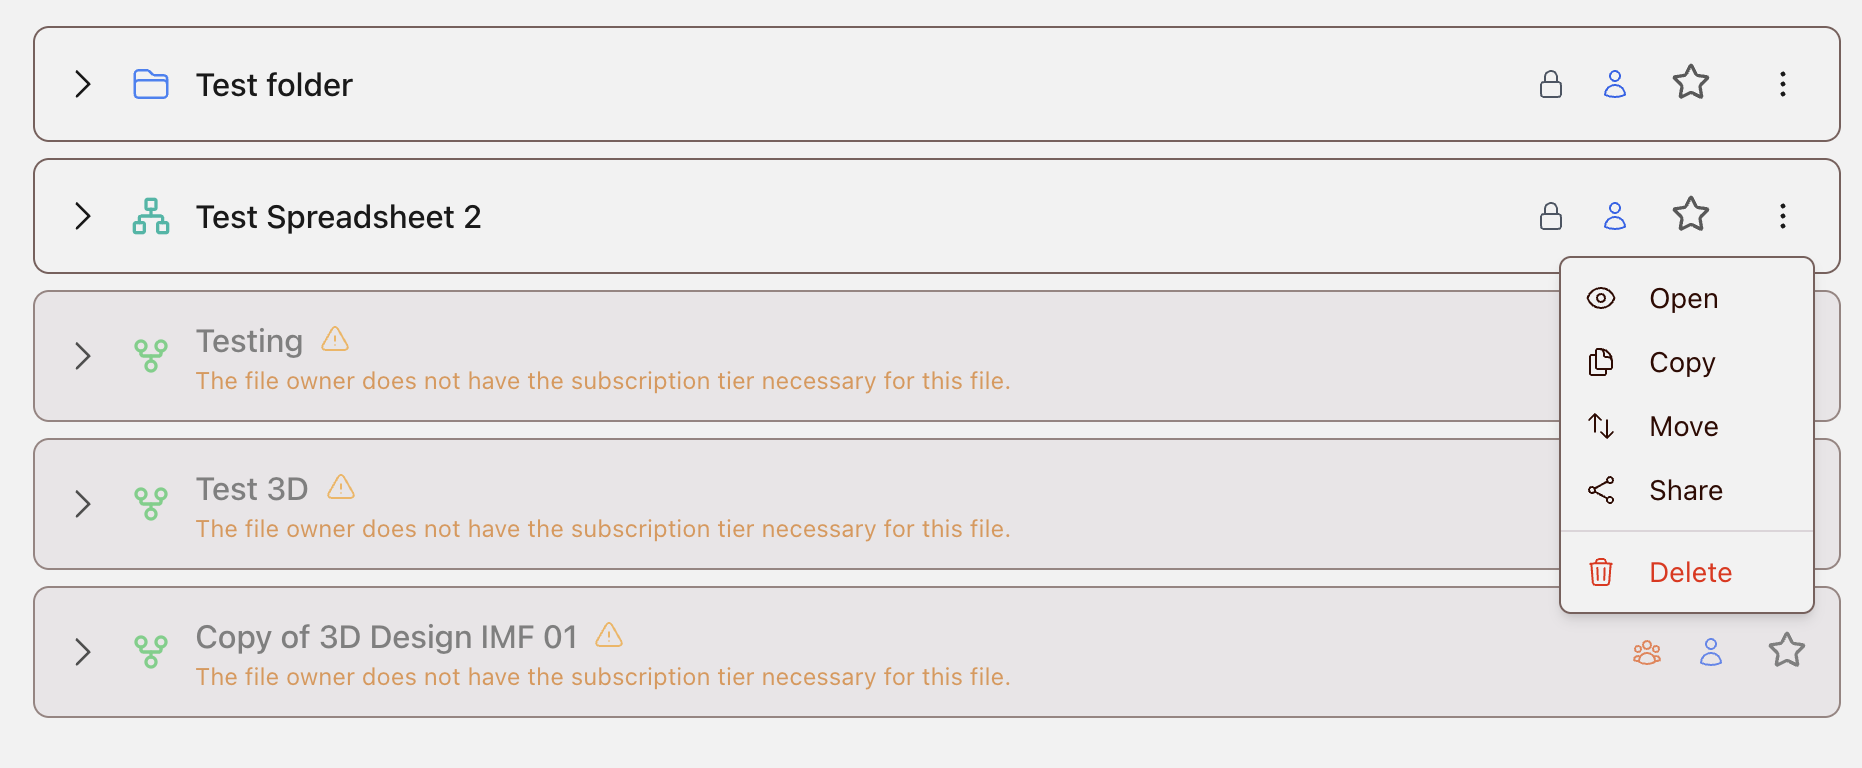
2. To share a project while in the project, select the Share icon in the header.

3. After selecting share, enter the email of the user you want to share the project with, their level of edit access, and click share.
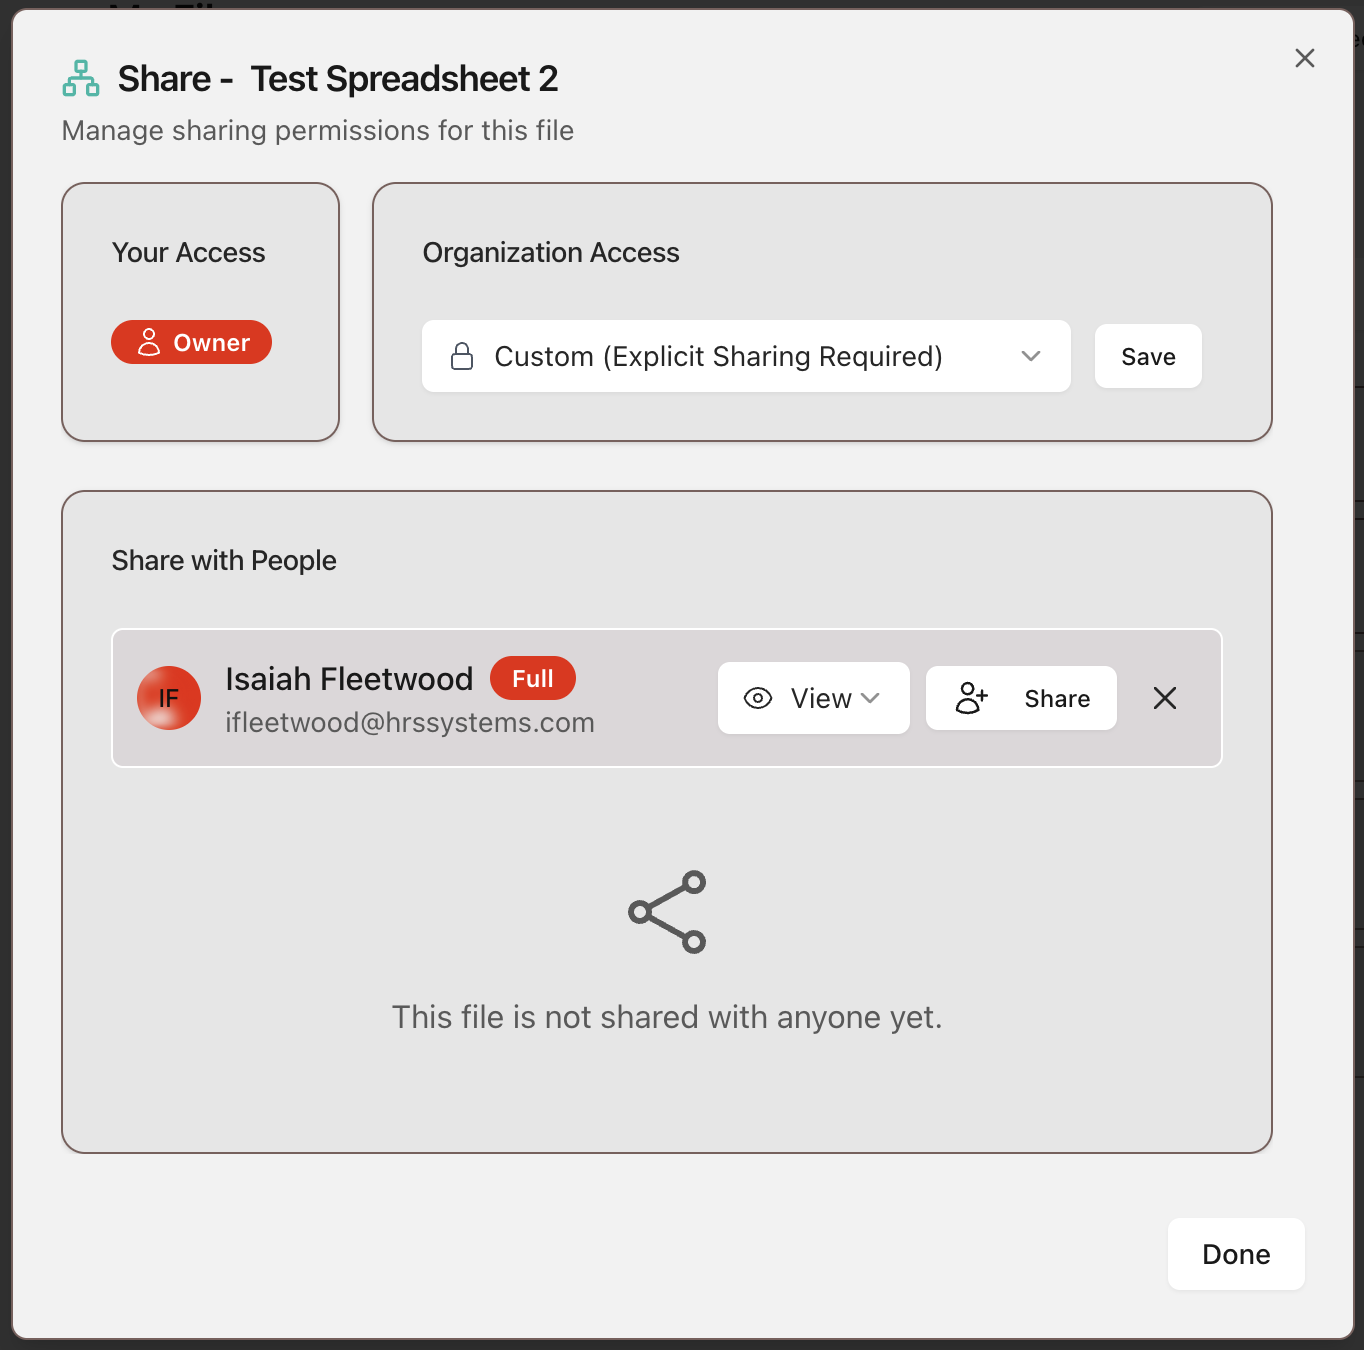
Edit Access Levels
View: View only.Edit: Fully edit permissions, but cannot delete the project.
Owner: Full access to edit and delete the project.
Saving a Project
Saving a Project
Status Indicator
Projects are automatically saved after each action or edit. Use the Status Indicator in the header to confirm whether the project is saved, currently saving, or failed to save. The Status Indicator is also shown in User Interface Basics.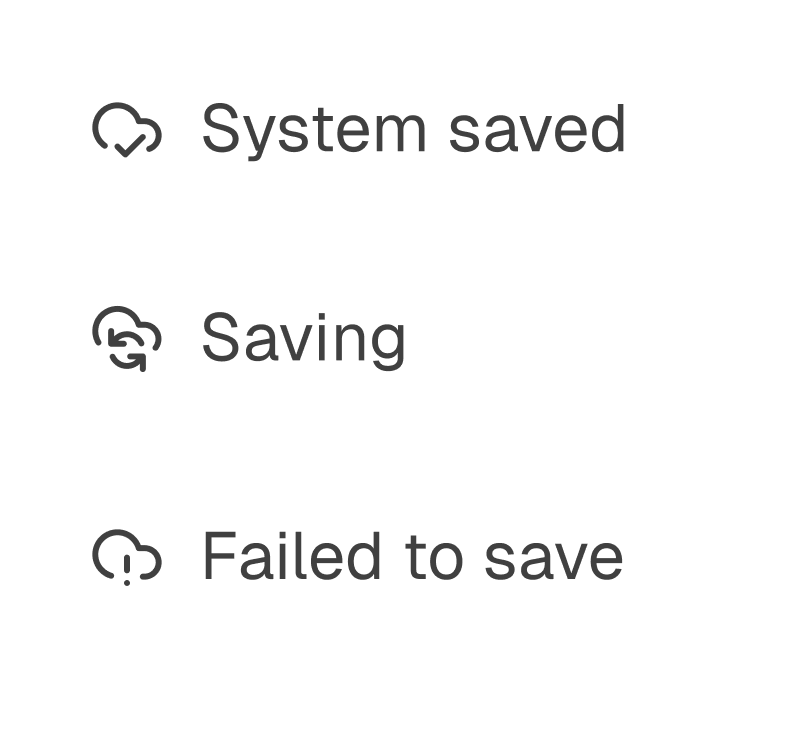
If a Project Fails to Save
A failed save is most often caused by a lost internet connection. Reconnect to the internet and check the Status Indicator again. If the failed save status continues, use Report Bug in the File Menu to contact support and review Troubleshooting -> General Errors.Deleting a Project
Deleting a Project
Delete a Project
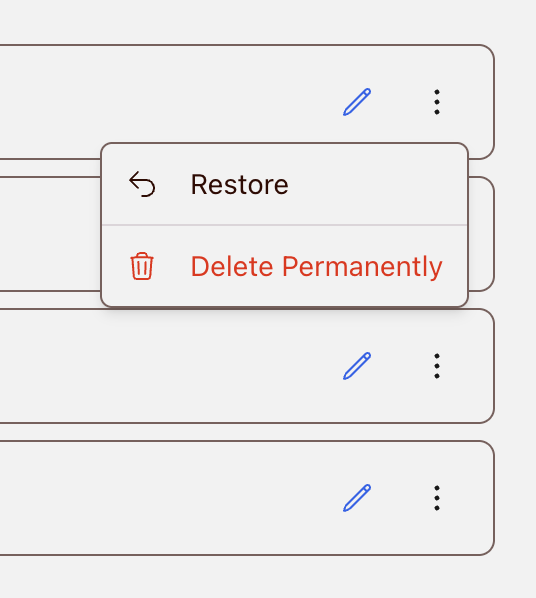
In the file system, find the project, select the 3-dot menu, then select Delete.Deleted projects remain in the Trash folder for 30 days. After 30 days, the project is permanently deleted and cannot be restored.
Restore a Deleted Project
Open the Trash folder, find the deleted project, select the 3-dot menu, then select Restore. The project is returned to its previous folder location.